How to Convert a Bootable USB to an .iso File

Thanks to: https://forums.hak5.org/index.php?/topic/15567-convert-bootable-usb-to-iso/
Download and install ImgBurn. It’s a free application, but be careful during installation that you don’t install the 3rd party crap with it. Make sure you select “Custom” during each screen and deselect the crapware that tries to sneak in.
Plug the bootable stick into your machine.
Open the ImgBurn application.
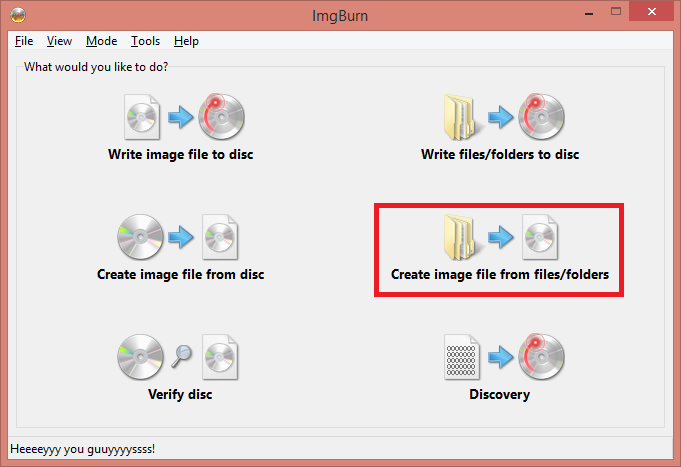
Now click on the “Create image file from files / folders”
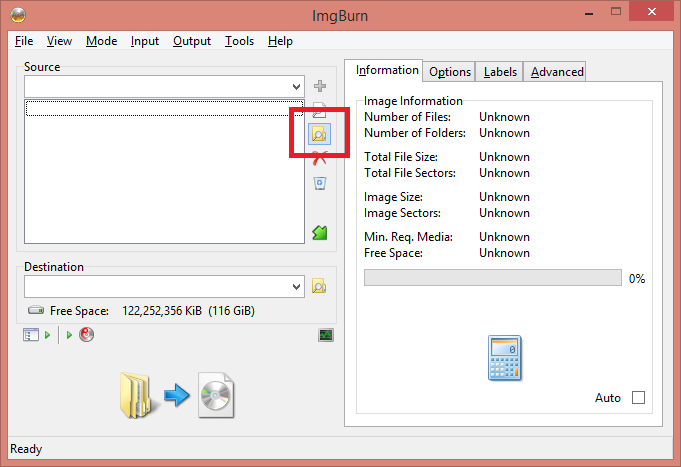
Next to the Sources pane, click on the Browse Folder button.
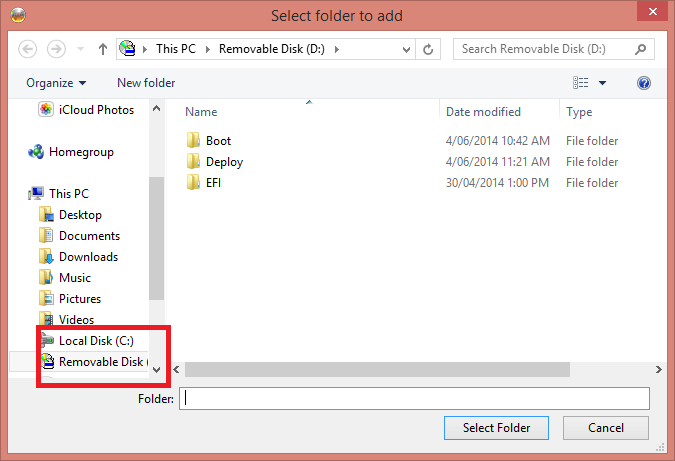
Select the folder or drive you want to convert. In this instance I’m just imaging the D: drive.
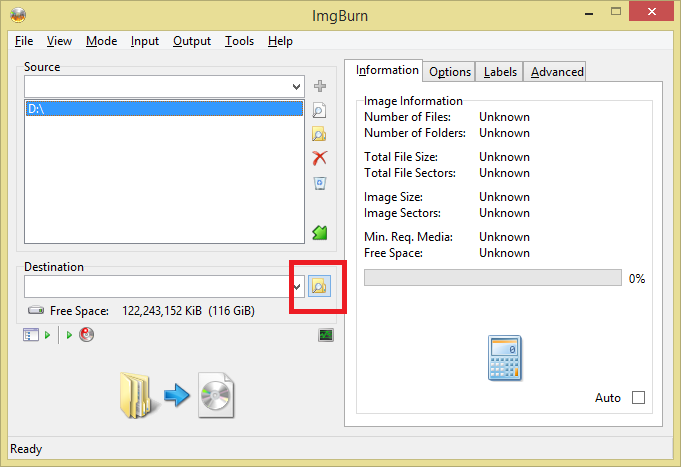
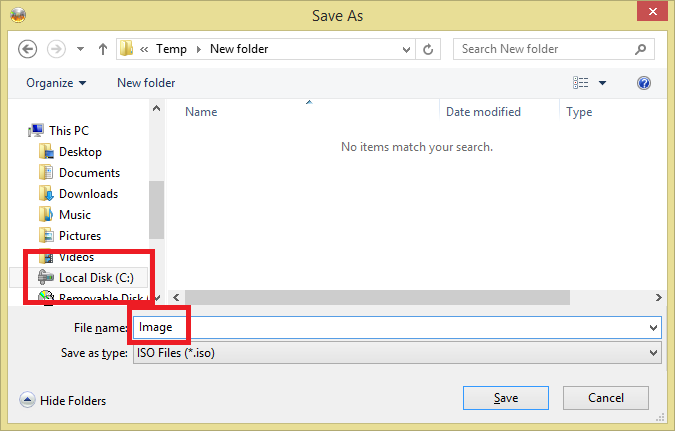
Next, click on the Browse Folder button next to the Destination part.
Select a location to store the .iso file, and the name for it. In this instance I’m saving it to C:\Temp\New Folder and naming it Image.
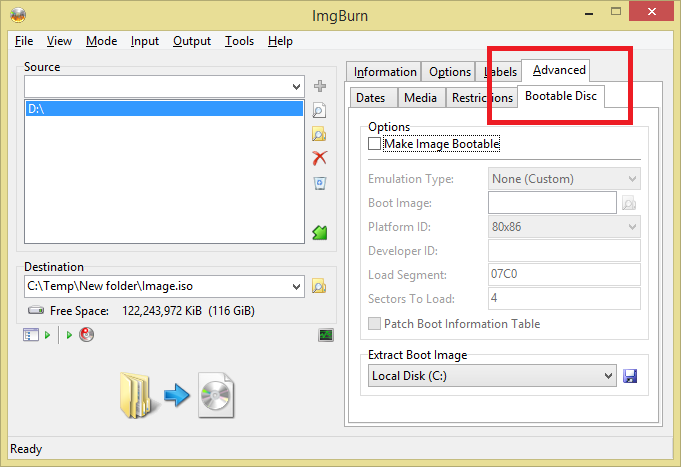
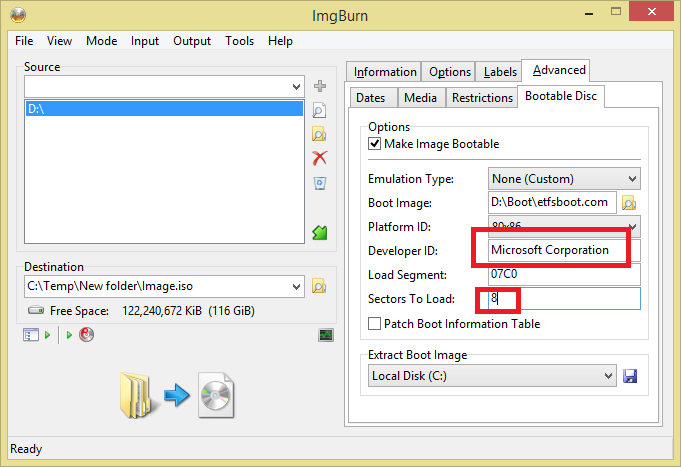
Click the Advanced tab, and then the Bootable Disc tab.
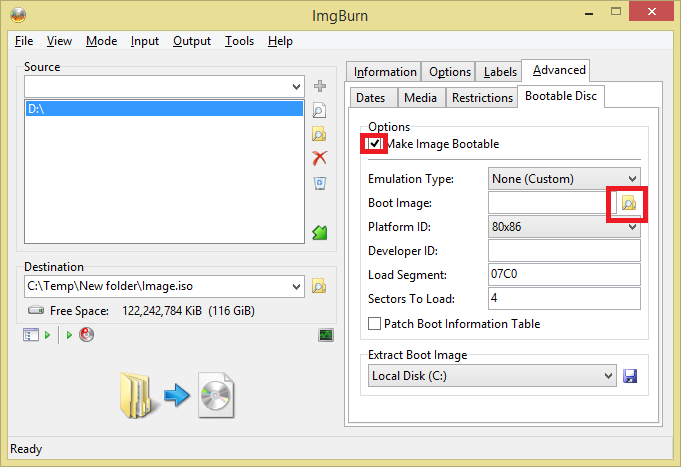
Check the Make Image Bootable checkbox, and click the Browse button next to Boot Image.
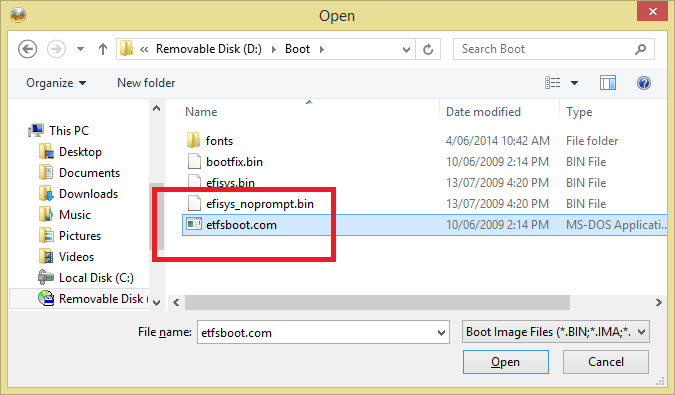
Browse to the Boot folder, and open the etfsboot.com file.
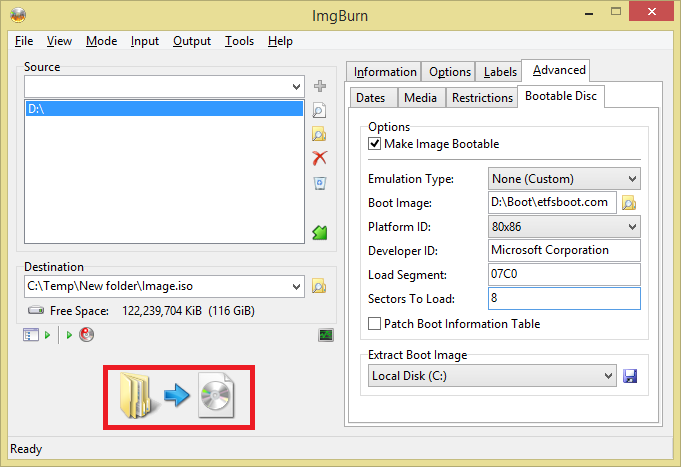
Set the Developer ID to Microsoft Corporation and the Sectors To Load to 8. Leave 07C0 in the Load Segment part.
Now click the big Build button on the bottom-left.
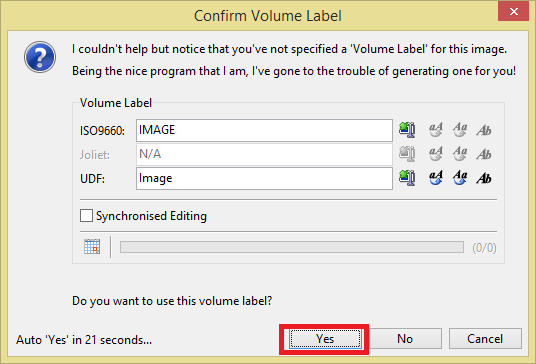
Because we didn’t give the image a title, we get this error. Just click Yes to accept the default, or provide a name you desire.
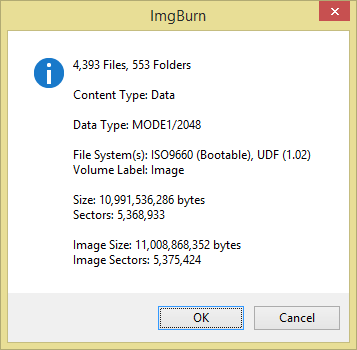
And you’ll receive a confirmation about what will happen next. Click OK. In my case, I actually had to go back to the advanced tab as well to permit making an image that exceeds the ISO standard size (Mine’s over 10GB).
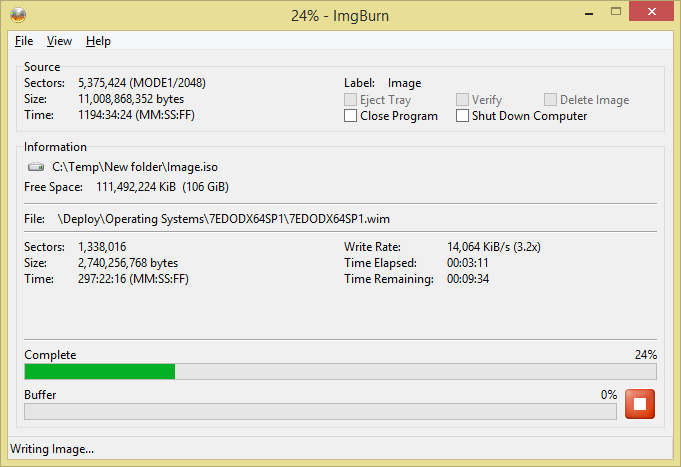
And then patiently wait…
And that’s it! Enjoy your newly created .iso file.